Making a Docker Dev Environment for OpenFaaS


Times are changing and so are development environments
Alongside the pandemic, new challenges have appeared. As time goes by, more and more teams are distributed around the globe as a result of companies embracing a remote-first mindset.
As software developers, we need to find new ways to collaborate that make our day easier. On one hand, a new trend seems to have emerged where development is slightly moving away from local to the cloud, where remote development environments are spin up within seconds, such as GitHub Codespaces and Gitpod for VSCode or Jetbrains Remote Development for IntelliJ.
On the other hand, Apple is betting on giving more performance to their new laptops with the new M1 PRO and M1 MAX chips, making it possible to run much more CPU and memory-intensive workloads. This opens a big opportunity to continue developing locally while still using containeraised development environments.
Tutorial
This tutorial should take you less than 10-15 minutes and at the end of it, you’ll be able to create a Docker Dev Environment for your OpenFaaS functions. You'll also learn how to define your custom base images to include as many dependencies as you need and how to set up your repository to make use of them.
What are Docker Dev Environments?
Every software developer has its own tooling. Every project is different and requires a different set of tools, libraries and runtimes. In general, in software projects, you will (hopefully) find a README.md file with the steps you need to take to build and run it locally.
For instance, a project could require a specific version of npm that you don't have installed in your machine, while others could specify yarn (v1 or v2). Of course, the last thing you want to do is to pollute your environment with multiple dependencies that you may only want to install for a couple of hours to try out something. And even less you want them to conflict with your well-establish dependencies that have been running fine in your host for months.
Docker Dev Environments (Preview) enables you to collaborate easily by allowing you to share work-in-progress code with your team members. When using Dev Environments, you can easily set up repeatable development environments, keeping the environment details versioned along with your code.
You can also share your work-in-progress code with your team members in just one click and without having to deal with any merge conflicts while moving between Git branches to get your code onto their machine.
Building a Docker Dev Environment for OpenFaaS
Imagine that, after you clone an OpenFaaS function repository, you could open VSCode and have all your dev tooling already available in the VSCode terminal, so you could start developing immediately.
In the following GitHub repository, you can find the two Dockerfiles that I used to define all the developer tooling to play with OpenFaaS functions.
- The
defaultdirectory contains a Dockerfile which is used to build the base image tagged asdocker.io/felipecruz/dev-environments-openfaas:0.1.0-alpha. This image will be used as the base image for the rest of the language-specific images.
It contains what I consider the most fundamental tools to develop, build and deploy OpenFaaS functions:
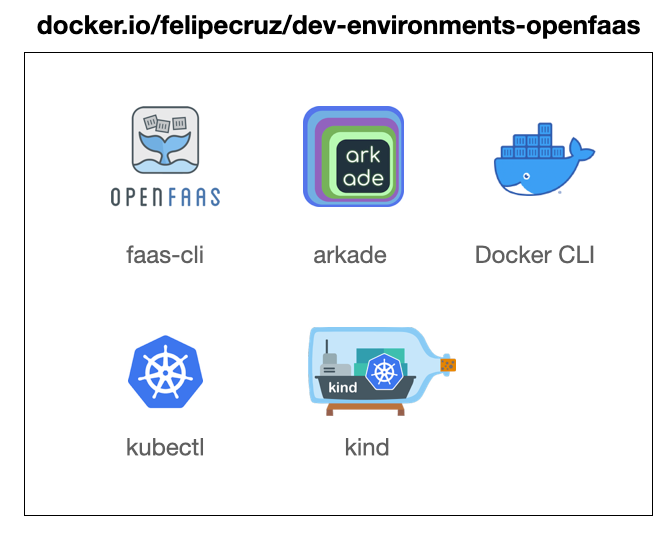
faas-cli- the CLI to build and deploy functions to OpenFaaS.arkade- a portable marketplace for downloading your favourite devops CLIs and installing helm charts, with a single command.docker- the Docker CLI to build/push images and manage containers, among others.kubectl- a CLI to control your Kubernetes clusters.kind- a tool for running local Kubernetes clusters using Docker container "nodes".
I use arkade to download some of the dependencies into the image, and while we could remove it from the image afterwards, I decided it could be very convenient to ship it as well. It will give us the flexibility to download more tools if needed at some point when we're inside the containerised development environment.- The
godirectory contains the Dockerfile to build the language-specific image on top of the previous base image, tagged asdocker.io/felipecruz/dev-environments-openfaas-go:0.1.0-alpha.
Setting the base image in your repository
In this other GitHub repository, you can find an example of an OpenFaaS Go Function (classic template) pulled from the OpenFaaS store, ready to run in a Docker Dev Environment.
To tell Docker we want to create a development environment, I've added a .docker directory at the root of the repository which contains a file named config.json. This is how you can specify the base image that you would like to use as part of your Dev Environment.
I'm using a language-specific image (Go) which is based upon the generic base image felipecruz/dev-environments-openfaas:0.1.0-alpha
{
  "image": "felipecruz/dev-environments-openfaas-go:0.1.0-alpha"
}
.docker/config.json (notice the -go suffix in the image name)
This image is about ~456 MB and contains all the dependencies from the generic base image plus the tools to develop the Golang function, e.g. go, make, git.
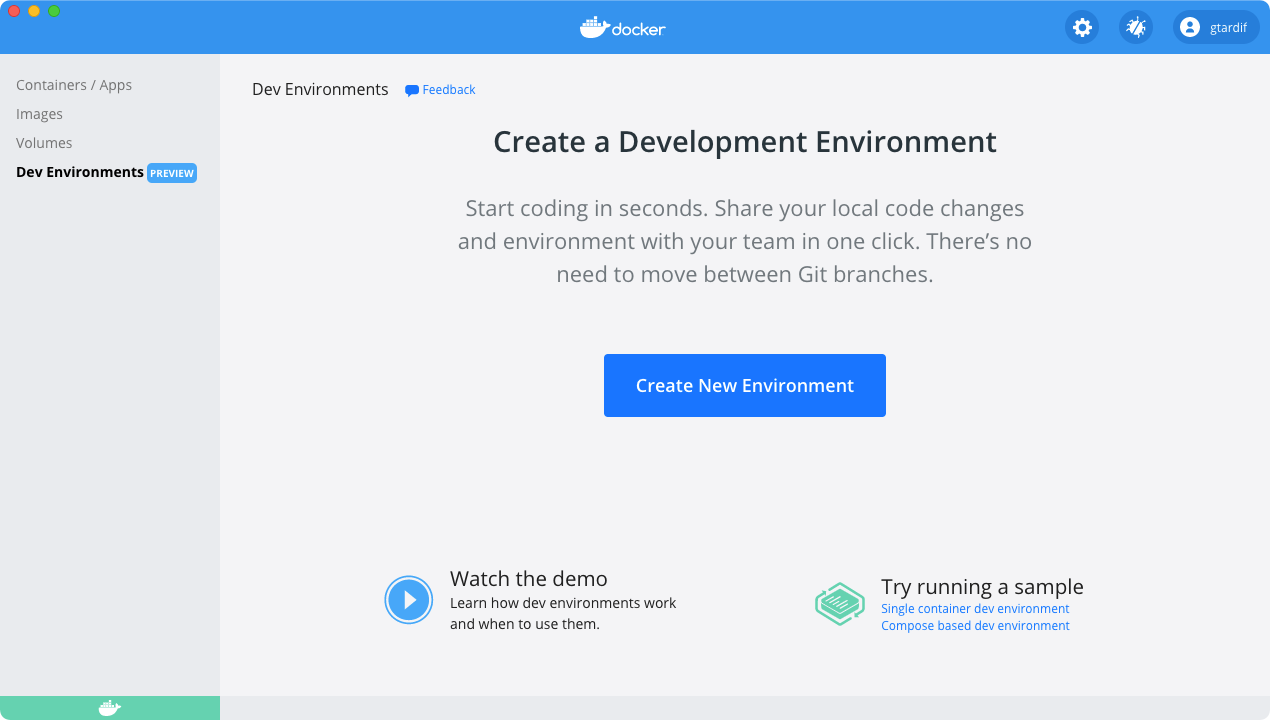
Creating the Development Environment from Docker Desktop
From Docker Desktop (version 3.5.0 or higher), open the Dashboard and click on the left menu tab Dev Environments (Preview).
To get started with Dev Environments, you must have Git, Visual Studio Code, and Visual Studio Code Remote Containers Extension installed on your machine. Learn more here.
Let's create a development environment from the previous Git repository. Enter the URL https://github.com/felipecruz91/openfaas-go-fn in the field below and press continue:
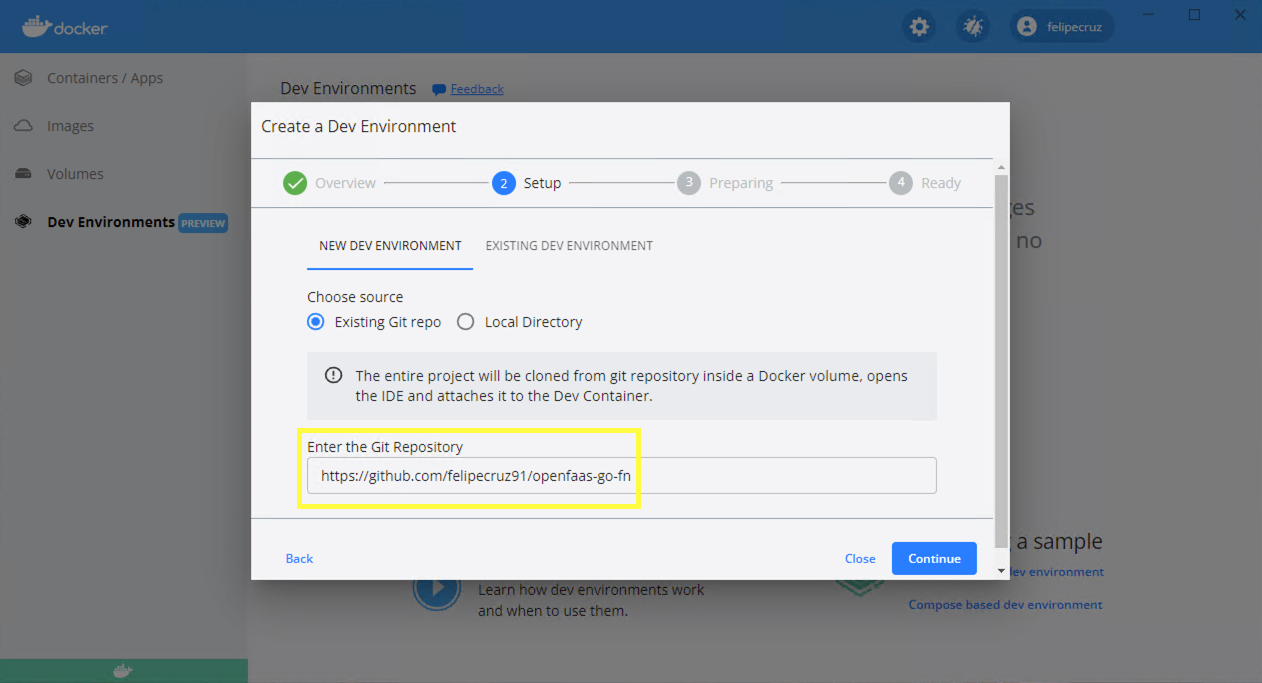
At this point, Docker will start cloning the specified Git repository into a Docker volume, detect the main language of the repository, pull the base image that was set in .docker/config.json to create a development container to which you can connect via VSCode in 1 click.
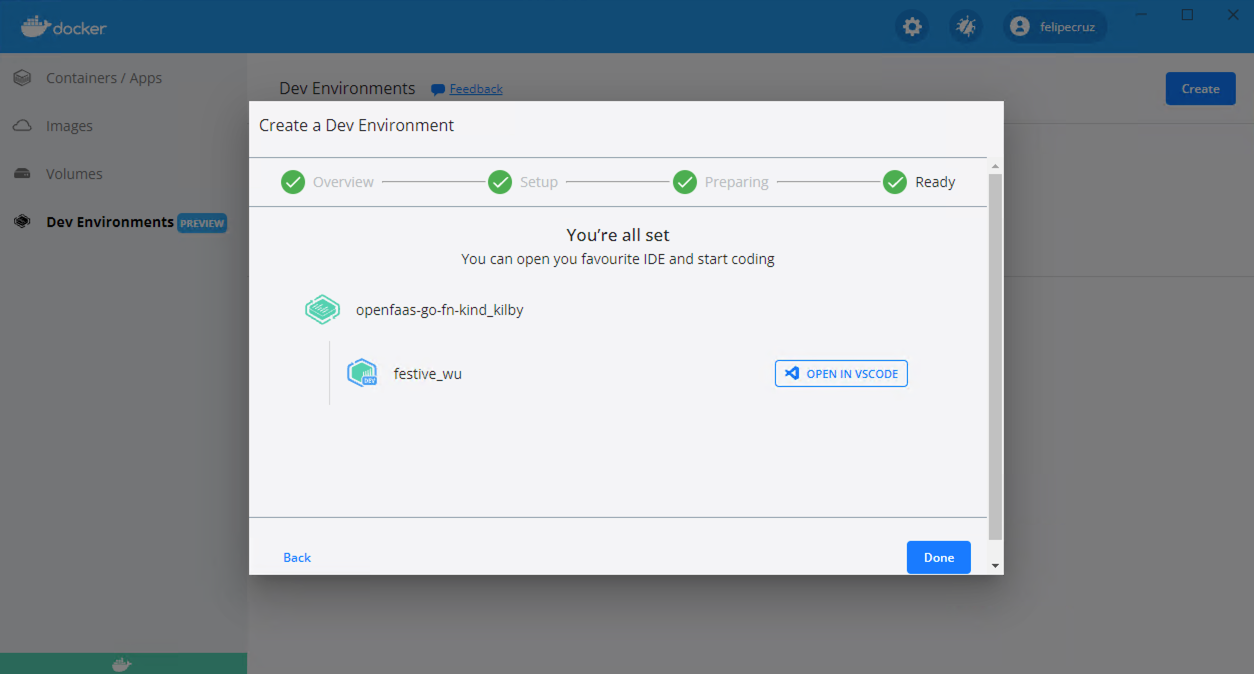
Open VSCode
Finally, you can connect to the development container to start building and developing your OpenFaaS function as you would usually do with VSCode. The only difference is that VSCode is connected to container (notice the green badge on the bottom-left corner) which contains all the developer tooling specified in the base image.
# Check that go is installed
$ go version

# Create a Kubernetes cluster
$ kind create cluster --config=kind.yml

# Install OpenFaaS in the Kubernetes cluster
$ arkade install openfaas

# Forward the OpenFaaS Gateway
$ kubectl rollout status -n openfaas deploy/gateway
$ kubectl port-forward -n openfaas svc/gateway 8080:8080 &

# Login into the OpenFaaS Gateway
$ PASSWORD=$(kubectl get secret -n openfaas basic-auth -o jsonpath="{.data.basic-auth-password}" | base64 -d; echo)
$ echo -n $PASSWORD | faas-cli login --username admin --password-stdin

# Build the function
$ faas-cli build -f go-fn.yml

# Login to DockerHub
$ docker login

# Push the function to DockerHub
$ faas-cli push -f go-fn.yml

# Deploy the function to the OpenFaaS Gateway
$ faas-cli deploy -f go-fn.yml
Commands to deploy the OpenFaaS function
Conclusion
Using Docker Dev Environments to create reproducible development environments definitely improves my development experience as I can get started developing, building, deploying and running OpenFaaS functions with all the dependencies shipped in a container.
You have learnt how to define your custom base images for Docker Dev Environments to include as many dependencies as you need to develop your OpenFaaS functions.
Do you use Docker Dev Environments already? Under what scenarios would you find Docker Dev Environments useful?
Feel free to leave us feedback about Docker Dev Environments in the official Github repository or in the community Slack.
Learn how to build OpenFaaS functions with Serverless for Everyone Else.